

If you’ve been thinking about changing banks, you’re not alone. Here in Vermont and New Hampshire, more of your neighbors are making the move to banks that offer better tools, more personal service, and a stronger commitment to the communities they serve.
Maybe you’re looking for lower fees, better online features, or a place where the tellers know your name. Or maybe you’re simply tired of the constant changes that come with big national banks and their out-of-town decisions and focus. Whether you’re switching to a new bank in New Hampshire or Vermont, the steps are the same. With the right plan, you can change banks smoothly and confidently.
This guide will show you how to switch banks step by step. You’ll learn how to change banks without problems, all while avoiding common pitfalls. No guesswork. No stress. Just a clear path to help you move your money and your accounts to a bank that puts you first, like a neighbor should.
Before You Start, Download our Switch Kit To Make Joining Union Bank Even Easier
We just updated our Switch Kit for consumer and commercial services, follow our guide with our Switch Kit in-hand to make the process easier and get the most out of your account with Union Bank:
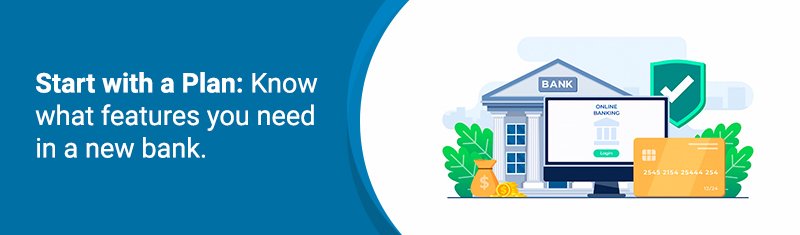
Step 1: Know What You Need From a New Bank
Before you start filling out forms or transferring money, it’s worth taking a few minutes to think about what matters most to you in a bank.
Some questions you might want to ask yourself:
- Do I want a nearby branch where I can talk to someone face-to-face?
- Do I rely on mobile banking, online bill pay, or tools like ApplePay?
- Am I looking for a bank that offers help with home loans, savings goals, or business services?
- Are Saturday hours important to me?
- How important is customer service?
If your current bank isn’t meeting your needs, it may be time for a change. At Union Bank, you’ll find a team that understands our local economy, shares your values, and is genuinely invested in your financial success. We take the time to listen, offer guidance that fits your life, and focus on what matters most to you.
Step 2: Open Your New Account First
Here’s a key detail that often gets overlooked: never close your old bank account before opening the new one. Keeping both accounts active for a short period ensures a smoother transition and gives you time to catch any automatic payments or deposits you might have forgotten about.
To open a new account, you’ll typically need:
- A government-issued photo ID
- Your Social Security number
- Proof of address (like a utility bill)
- An initial deposit, if required
Union Bank makes this part of the process fast, secure, and easy to complete from your phone or computer. Whether you’re looking to switch checking accounts or open a new savings account, Union Bank makes it simple to complete the application in just a few minutes.
Click here to see exactly what you’ll need and how to apply online
With your new account now established, the next vital step is to ensure your income and regular payments are directed correctly.
Step 3: Redirect Your Direct Deposits and Recurring Payments
This is where a little planning can make a big difference.
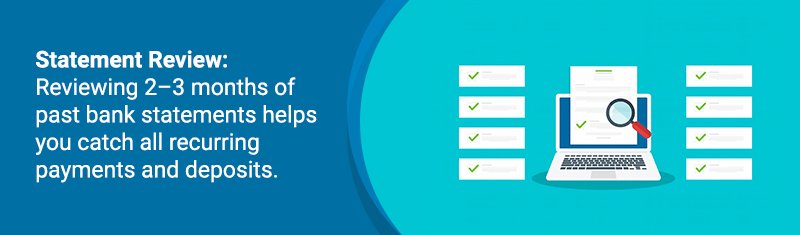
Start by reviewing your old bank account statements from the last two or three months. Make a list of everything that comes in and everything that goes out. This includes:
- Direct deposit from your employer
- Government benefits or retirement income
- Utility bills, rent, or mortgage payments
- Subscription services like Netflix or Spotify
- Gym memberships or insurance premiums
Once your new account is set up, you can begin switching these payments over one at a time. Many companies and employers allow you to make these changes online.
To assist you in this process, Union Bank offers a Switch Kit designed to make moving your banking relationship simple and convenient. This kit provides guidance and resources to help you organize and manage the transition of your direct deposits and recurring payments.
Don’t rush through this part. Giving yourself a week or two to make the updates will help you avoid any surprises. This timing helps you transfer bank accounts without disruption.
Step 4: Move Your Money
After your new account is open and your recurring payments have started to shift over, you’re ready to move money to your new bank account. Some people prefer to transfer the full amount in one go, but it can also be wise to do it in stages.
Start by moving enough to cover upcoming bills and leave a little extra as a buffer. Then transfer the rest once you’re confident that all your payments and deposits have made the jump.
Just keep in mind:
- Online transfers between banks can take a few business days
- Some banks have daily or monthly limits for transfers
- If you still have auto-payments coming out of your old account, be sure to keep enough money there to cover them
A good rule of thumb is to leave $100 to $500 in your old account until you’re absolutely sure everything has cleared.
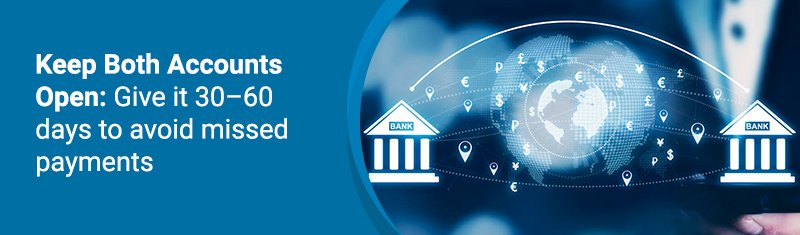
Step 5: Double-Check Your Automatic Activity
Even after you’ve made all the switches, it’s a good idea to keep both accounts open for about 30 to 60 days. This gives you a chance to catch any lingering activity.
Set up alerts on both accounts so you’ll get a text or email anytime money moves. Most banks offer these tools within their mobile apps. You can also log in every few days to look for anything unexpected.
If you spot a subscription or bill that hasn’t been updated, now’s your chance to fix it before closing the old account for good.
Step 6: Close Your Old Account
Once you’re confident that your direct deposit, bills, and automatic payments are all running through your new account, it’s time to say goodbye to your old bank.
This step is more important than people think. An inactive account could still get hit with maintenance fees or overdraft charges, so don’t leave it open longer than necessary.
Here’s how to wrap it up:
- Contact your old bank and formally request to close the account
- Ask for written confirmation that the account is closed
- Destroy or return any old debit cards, checks, or banking materials tied to the account
If you use a budgeting app or financial planning software, remember to update your bank info there, too.
Step 7: Make the Most of Your New Bank
You made the switch. Now it’s time to enjoy the benefits.
Set up account alerts to track your balances and spending habits. Use mobile banking features to deposit checks, pay bills, or check balances wherever you are. Sending money to friends or family? UBP2PHub from Union Bank lets you make secure peer-to-peer payments in just a few taps.
At Union Bank, we encourage new customers to sit down with a banker for a free account review. Whether you’re thinking about buying a home, building credit, or saving for a big goal, we’re here to support you at every stage of your financial life.
Take a moment to explore what else your new bank offers. You may discover tools and services you never knew you needed.
Are You Ready to Make a Change?
Switching banks might feel like a big decision, but with the right steps, it’s easy to do it without any hiccups. And the reward is worth it: better service, a stronger community connection, and banking that fits your life.
At Union Bank, we’ve been serving our neighbors since 1891. We’re proud to be a true community bank, offering personal service and modern tools to help you thrive. Whether you’re opening your first account, planning for retirement, or growing your business, we’re here to help every step of the way.
Switching banks in Vermont and New Hampshire is easier than ever. Start the process of switching to a long-standing community bank today. We’ll help you move your accounts, answer your questions, and make the transition simple and seamless.
Stay local. Go far. That’s more than a tagline, it’s how we do business.
Publisher: Source link


